
|
|
|
|
|
What Type Of Clay Should I Use?
|
|
| Gallery | The Studio | Links |
|
What Type Of Clay Should I Use?
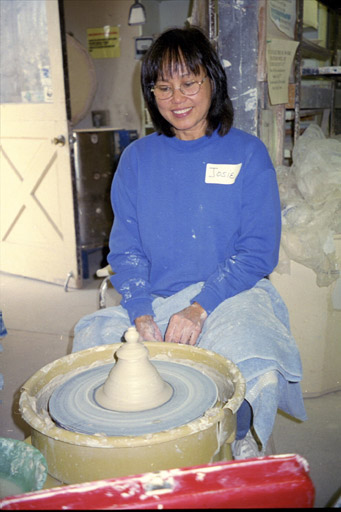
Any type of clay that does not contain any grog, or that has very fine grog, such as Porcelain or Porcelain-like clays will work. Even though I don't always high-fire, I almost always use high-fire clay, to avoid any accidental firings of low-fire clay to high-fire temperatures. My favorite clay to throw for miniatures is a very forgiving Porcelain called Glacia, manufactured by Clay Planet in Santa Clara, California. I like this Porcelain because it stands up well to abuse (ex: heat gun, too much or not enough water, etc.), it's easy to throw for a Porcelain, and it's less expensive than other Porcelains. It turns translucent when it's very thin or when fired to very high temperatures, such as in a Wood Fire kiln we took up to cone 13 (not exactly on purpose). Since the pottery will be of very small scale, traditional hand-throwing techniques will be difficult. The following types of tools are in my tool box:
These instructions assume you already know the basics of wheel-throwing. The basic throwing principles apply to throwing miniatures, with some modifications.
Using sharp, small carving tools and your razor blade, you can trim miniatures just as you would any larger piece of pottery, but it's not easy. Each potter finds their way. First try using the top of the mound of clay as a "chuck" or base on which to center your piece upside down to trim the foot of your pot. Be careful as this may chip or crack the lip of your piece. I have become pretty good at hand-trimming the bottom of my mini pots, primarily using the razor blade. Don't forget to sign your piece. Glazing miniatures is similar to glazing full-size pottery, but you don't use your hands as much. Start with a Bisque-fired miniature, apply any under-glazes or stains you may want, then dunk you piece in the glaze. Use long tweezers or jewelry tongs to hold the piece when dunking. Take your time wiping off or shaving off the glaze with a razor blade. Remove all excess glaze off the under-side and from the bottom 1/16 in or so of glaze on the outside of the base. Make a small utility dish to carry your miniatures in from kiln to kiln during the firings. The dish can be about 4 or 5 inches in diameter, and about 1 or 2 inches tall, bisqued, unglazed. It can be re-fired several times before you need a new one, even in the high-fire. Make sure that the inside of the bottom is very flat if you use the bowl for glaze firings, so your piece does not fall over or lean on another pot. As you prepare for the glaze-firing, use Elmer's Glue to temporarily attach the pieces in the exact location where you want them to be fired. The glue will burn off.
Other thoughts... Not discussed here in great detail are athmospheric firing techniques, such as Raku, Sawdust, Saggar and Pit firings. I have also used these methods to fire a few miniatures, but have personally been unable to get satisfactory results thus far. The Raku firing has worked somewhat (miniatures cool too fast), but the Sawdust and Pit firings have resulted in smoky, flat clay surfaces on my miniatures, which I did not find appealing. I likely should spend more time burnishing the miniatures before trying these firing methods again, but that sounds like a lot of work with a high possibility of breaking the pieces during burnishing (rubbing the leather-hard surface until it becomes highly compressed and shinny). I have fired miniatures in a Wood Fire kiln with great results. I like this firing technique, but it's not very common. When it works, the results are great. First you have to find someone that has a wood fire kiln. You have to also be extra careful about how you place your miniatures in the kiln, preparing for the possibility of finding your miniatures in the piles of ash in the kiln, or of your miniatures getting blown away, stuck to another pot, to the wadding, kiln shelf or post...or never finding them at all. |

|
|
|
|
| Gallery | The Studio | Links |

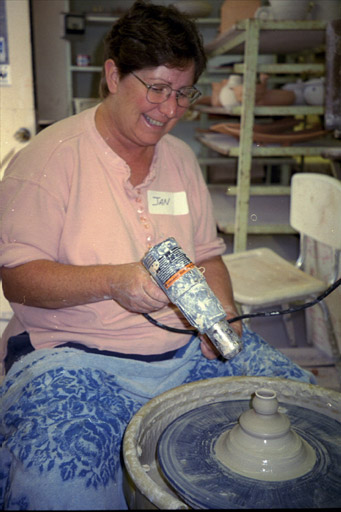 When you finish shaping, with the wheel spinning slowly, dry the finished piece to a leather-hard stage using the heat gun before cutting it off the mound (careful...it dries very fast).
Drying makes it possible to pick up the piece by hand and further trim, carve, or apply slip to the piece as desired.
IMPORTANT NOTE: Handles must be attached before drying your piece.
When you finish shaping, with the wheel spinning slowly, dry the finished piece to a leather-hard stage using the heat gun before cutting it off the mound (careful...it dries very fast).
Drying makes it possible to pick up the piece by hand and further trim, carve, or apply slip to the piece as desired.
IMPORTANT NOTE: Handles must be attached before drying your piece.